TempEdit is a website content manager built specifically for the unique needs of school districts.
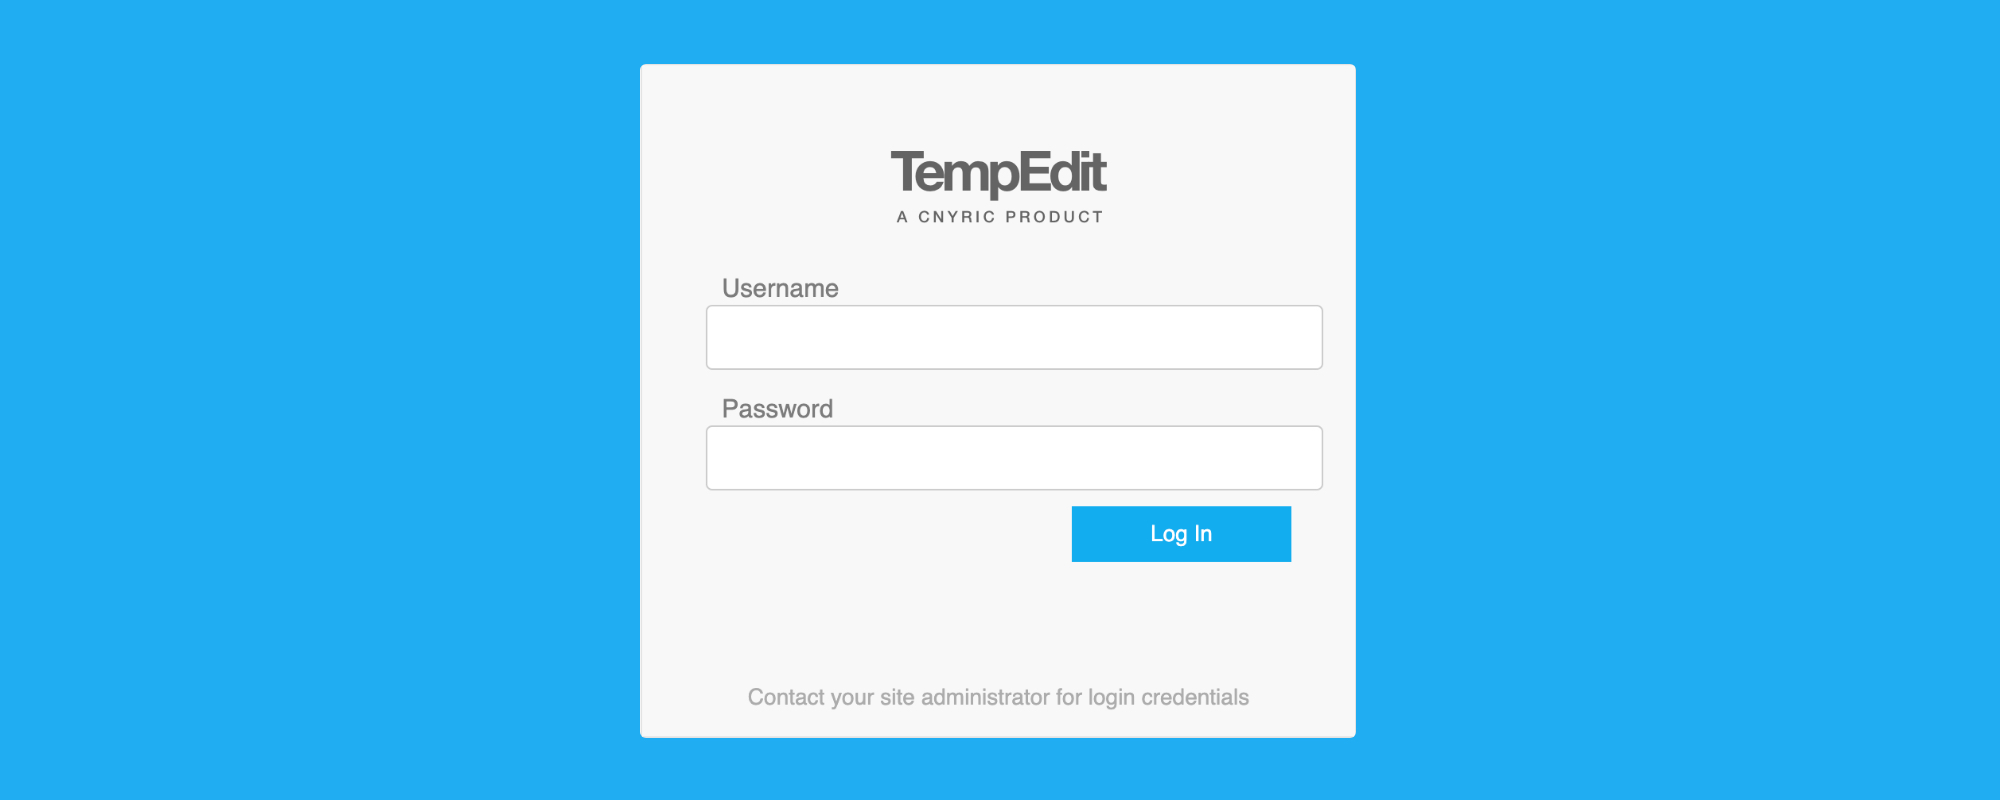
Logging into Tempedit
- Visit www.yourDistrictWebsite.org/protected (be sure to insert the correct district website into address)
- Enter your username & password
- Contact your website administrator if you don’t have a username or password
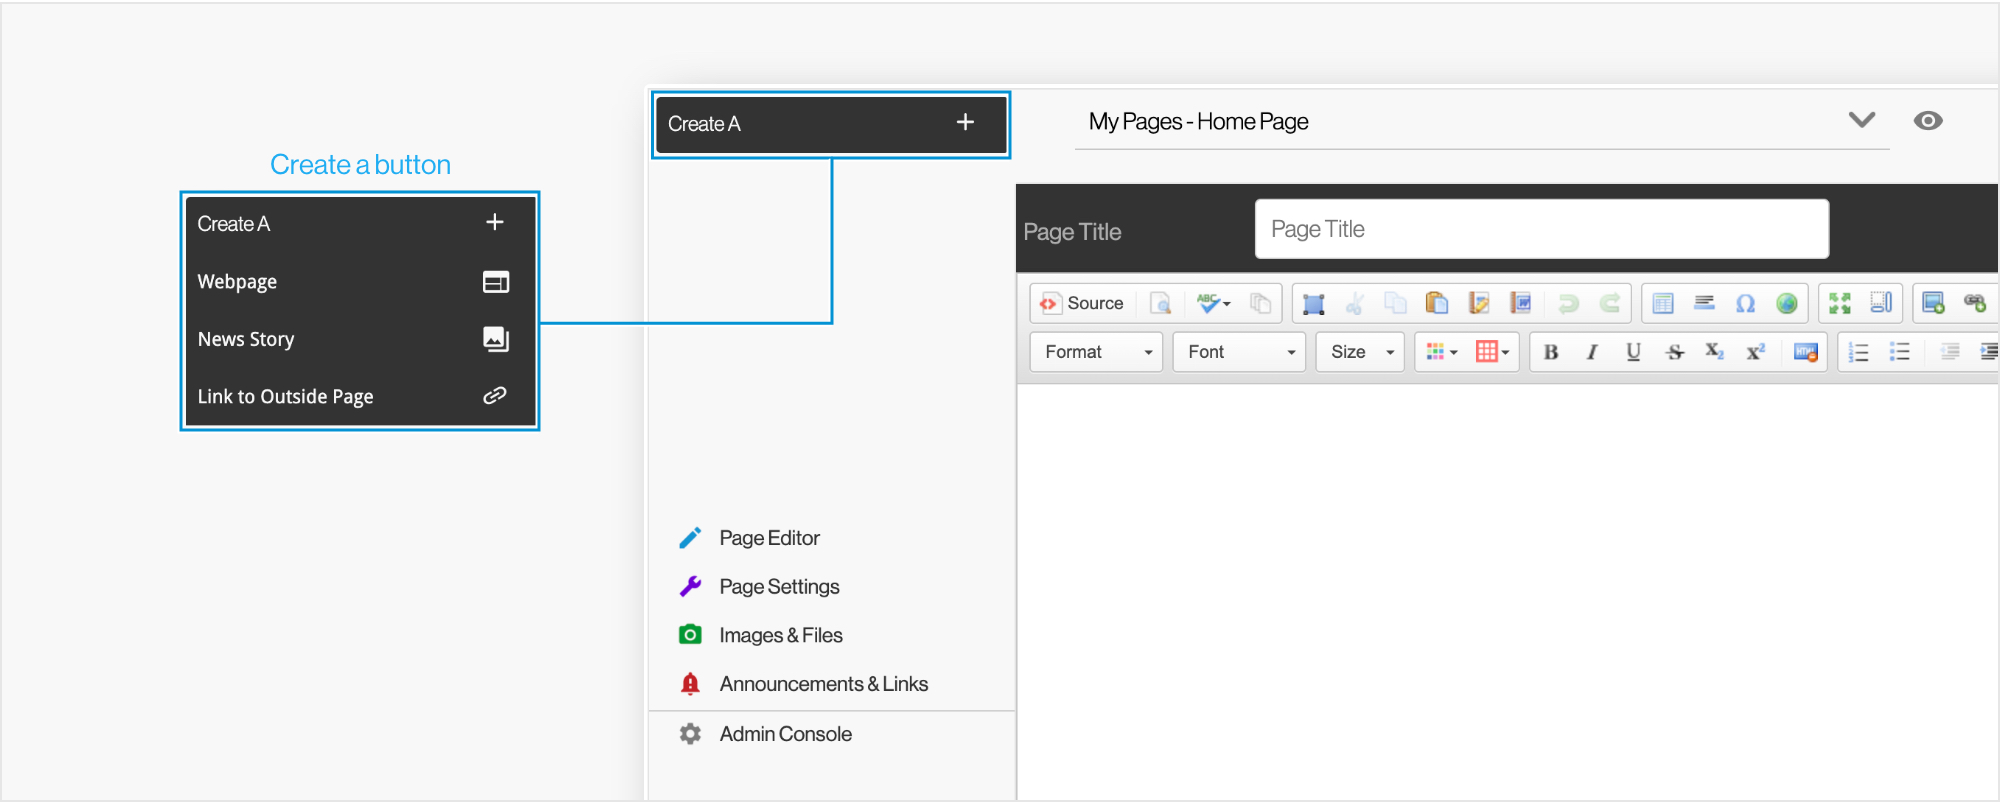
Adding a Web Page
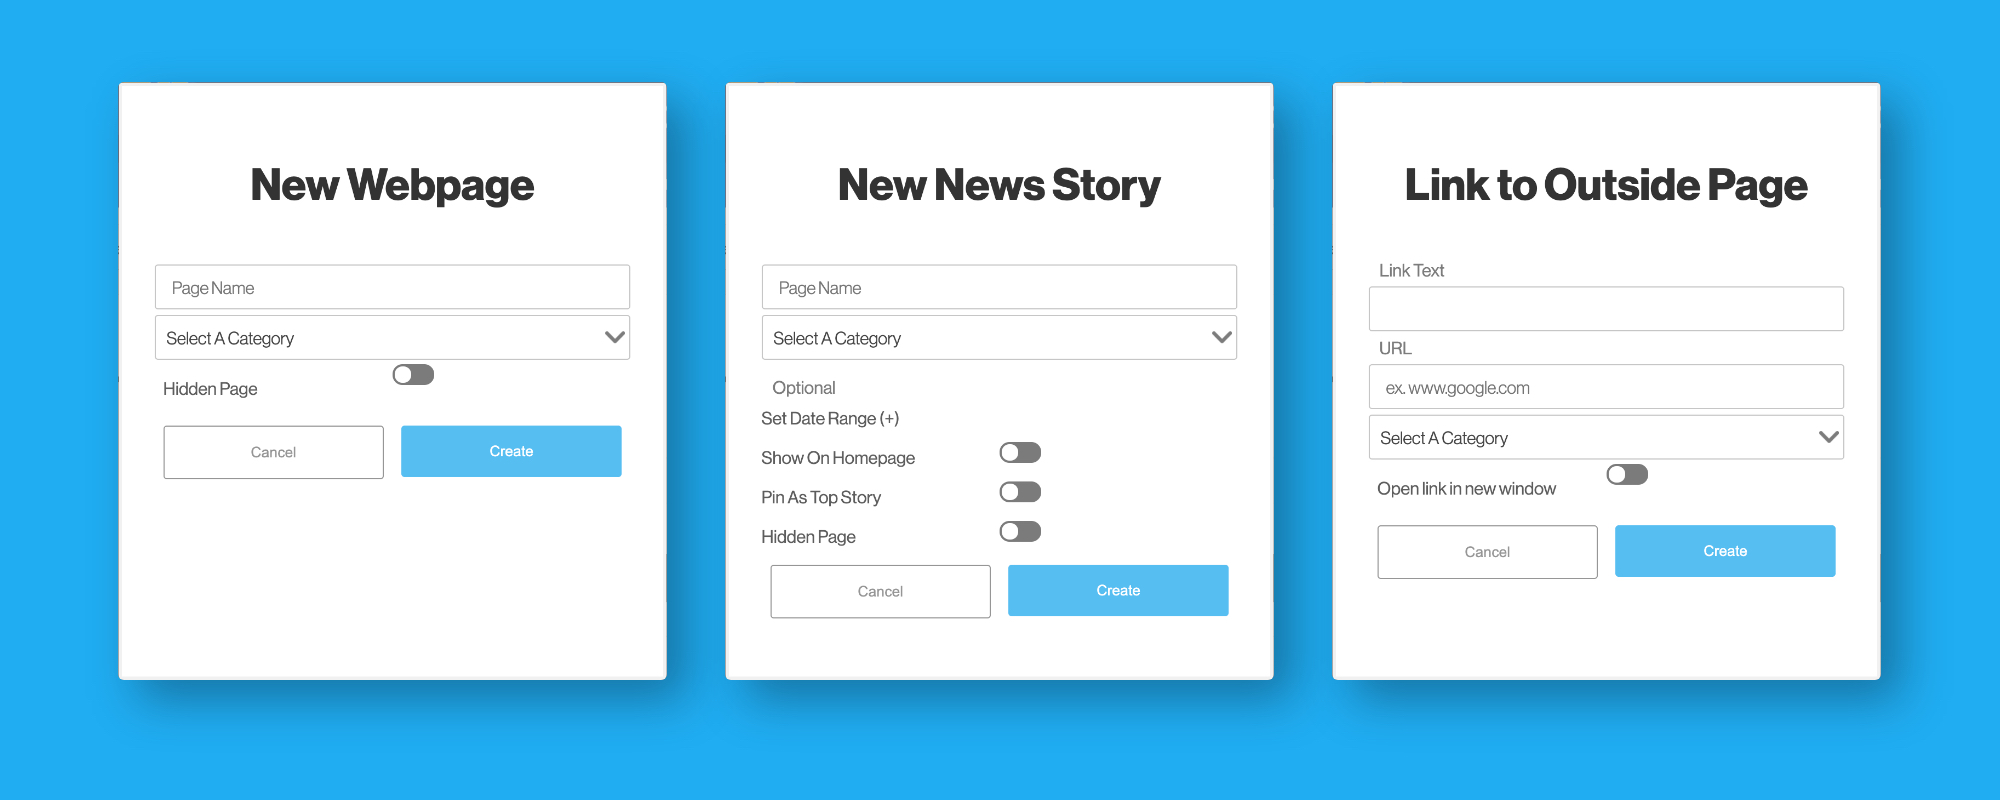
- Mouse over the “Create A” button
- Select what you would like to create from the menu
- Fill out the mandatory fields in the pop-up box (Settings are editable after in Page Settings)
- Click the "Create" button
Webpages
Appear in the lefthand navigaiton of your website, based on category
Appear on your sitemap |
|
News Stories
Appear chronologically in the news section of your homepage
Have a custom thumbnail photo for users to click
|
More About News Stories |
|
Outside Links
Appear in the lefthand navigaiton of your website, based on category
Can be linked to any content in or outisde of your website
Can be links to other file types, such as .PDFs, .DOCs, google Docs, etc. |
|
Tip: Be sure to save your changes while using TempEdit
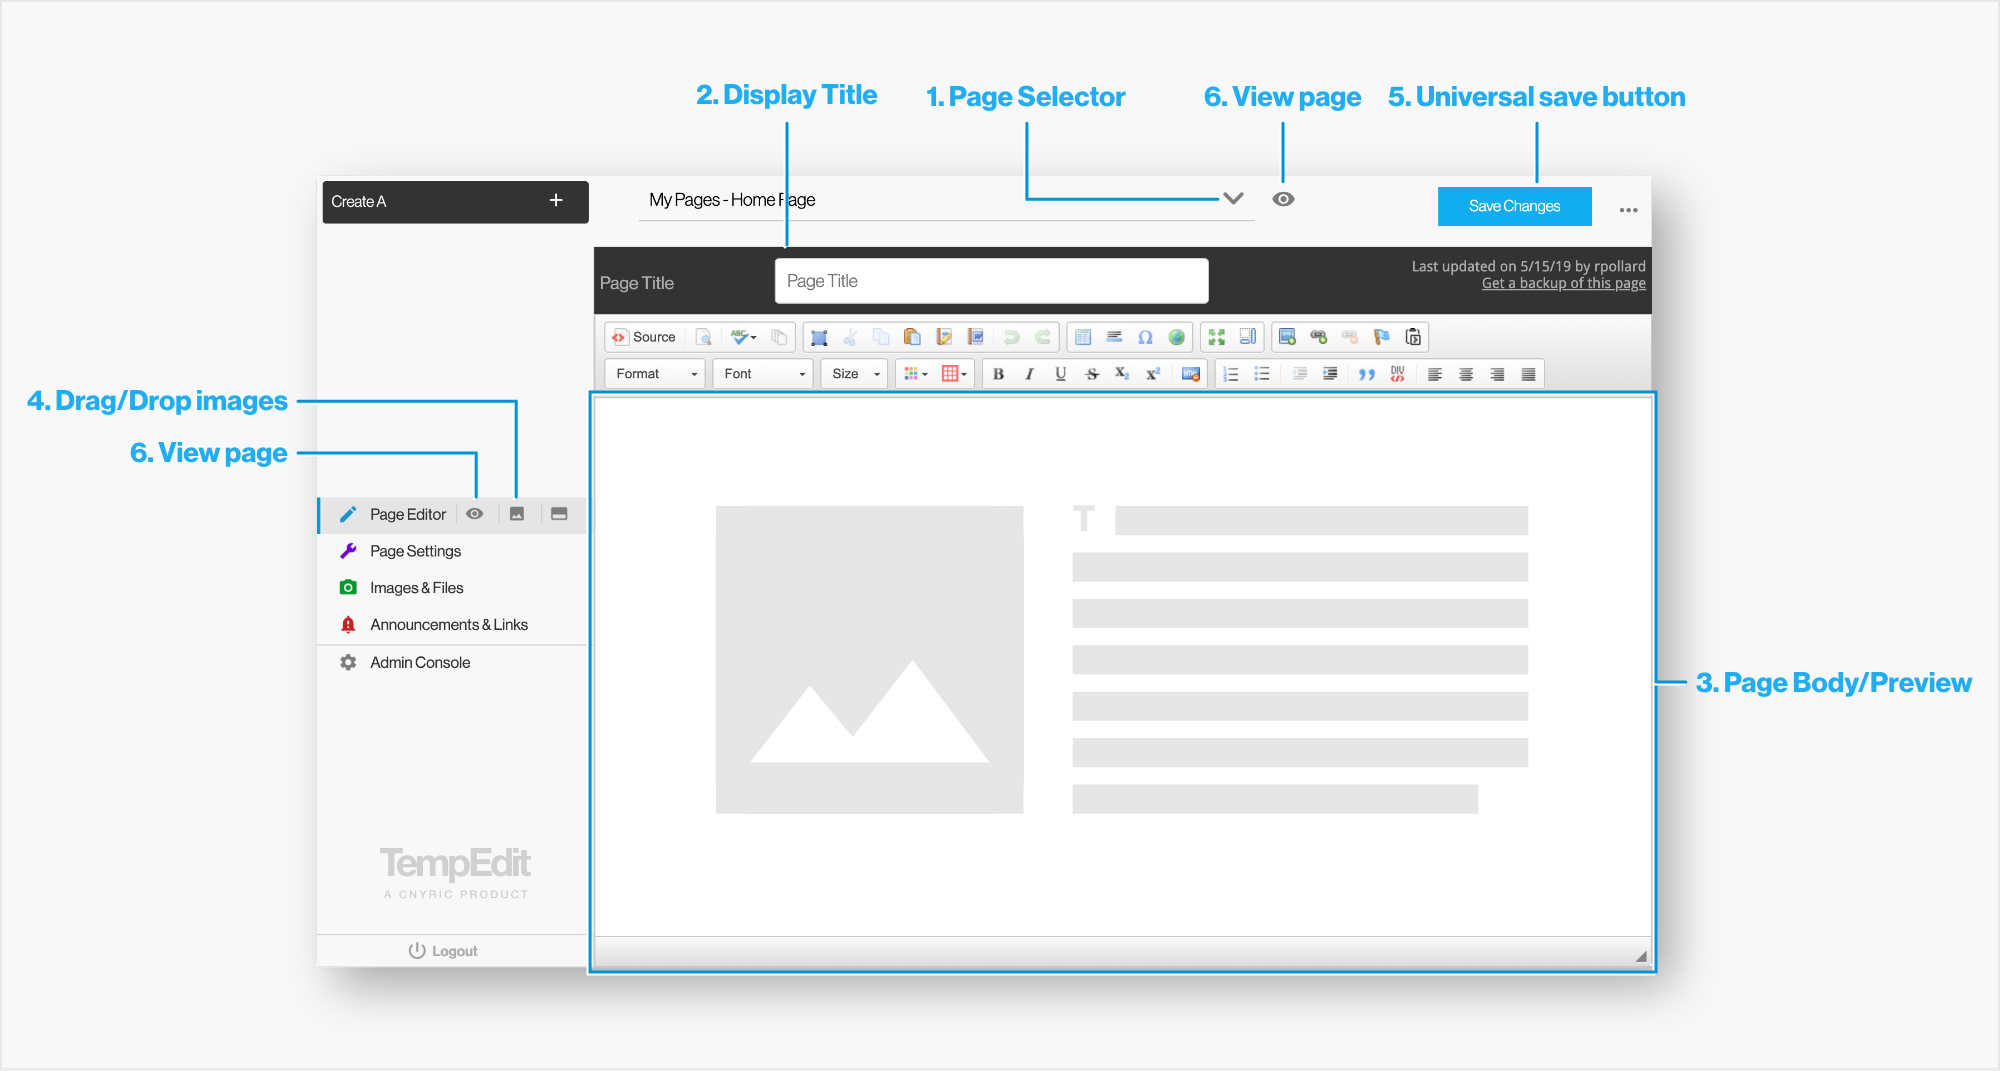
Using the Page Editor
- Already created Web Pages, New Stories, and External Links all appear here, in the Page Selector. Select a page from the list to edit. To create a new page visit our Adding Pages section.
- All pages should be given a brief, but descriptive display title, adding this title helps your page be ADA compliant.
- Text, uploaded images, and other page content can be added to your webpage in the Page Body. The editor is similar to working on MS Word.
- By clicking the drag/drop images icon, a popup window will appear. From here Uploaded Images can be drag/dropped into the Page Body.
- Save changes with the save button before leaving the Page Editor or any other screen you have made changes to. Failing to do this will result in loss of work.
- To view your page click either of the view page eyeball icons to the left of the selection dropdown or the page editor title.
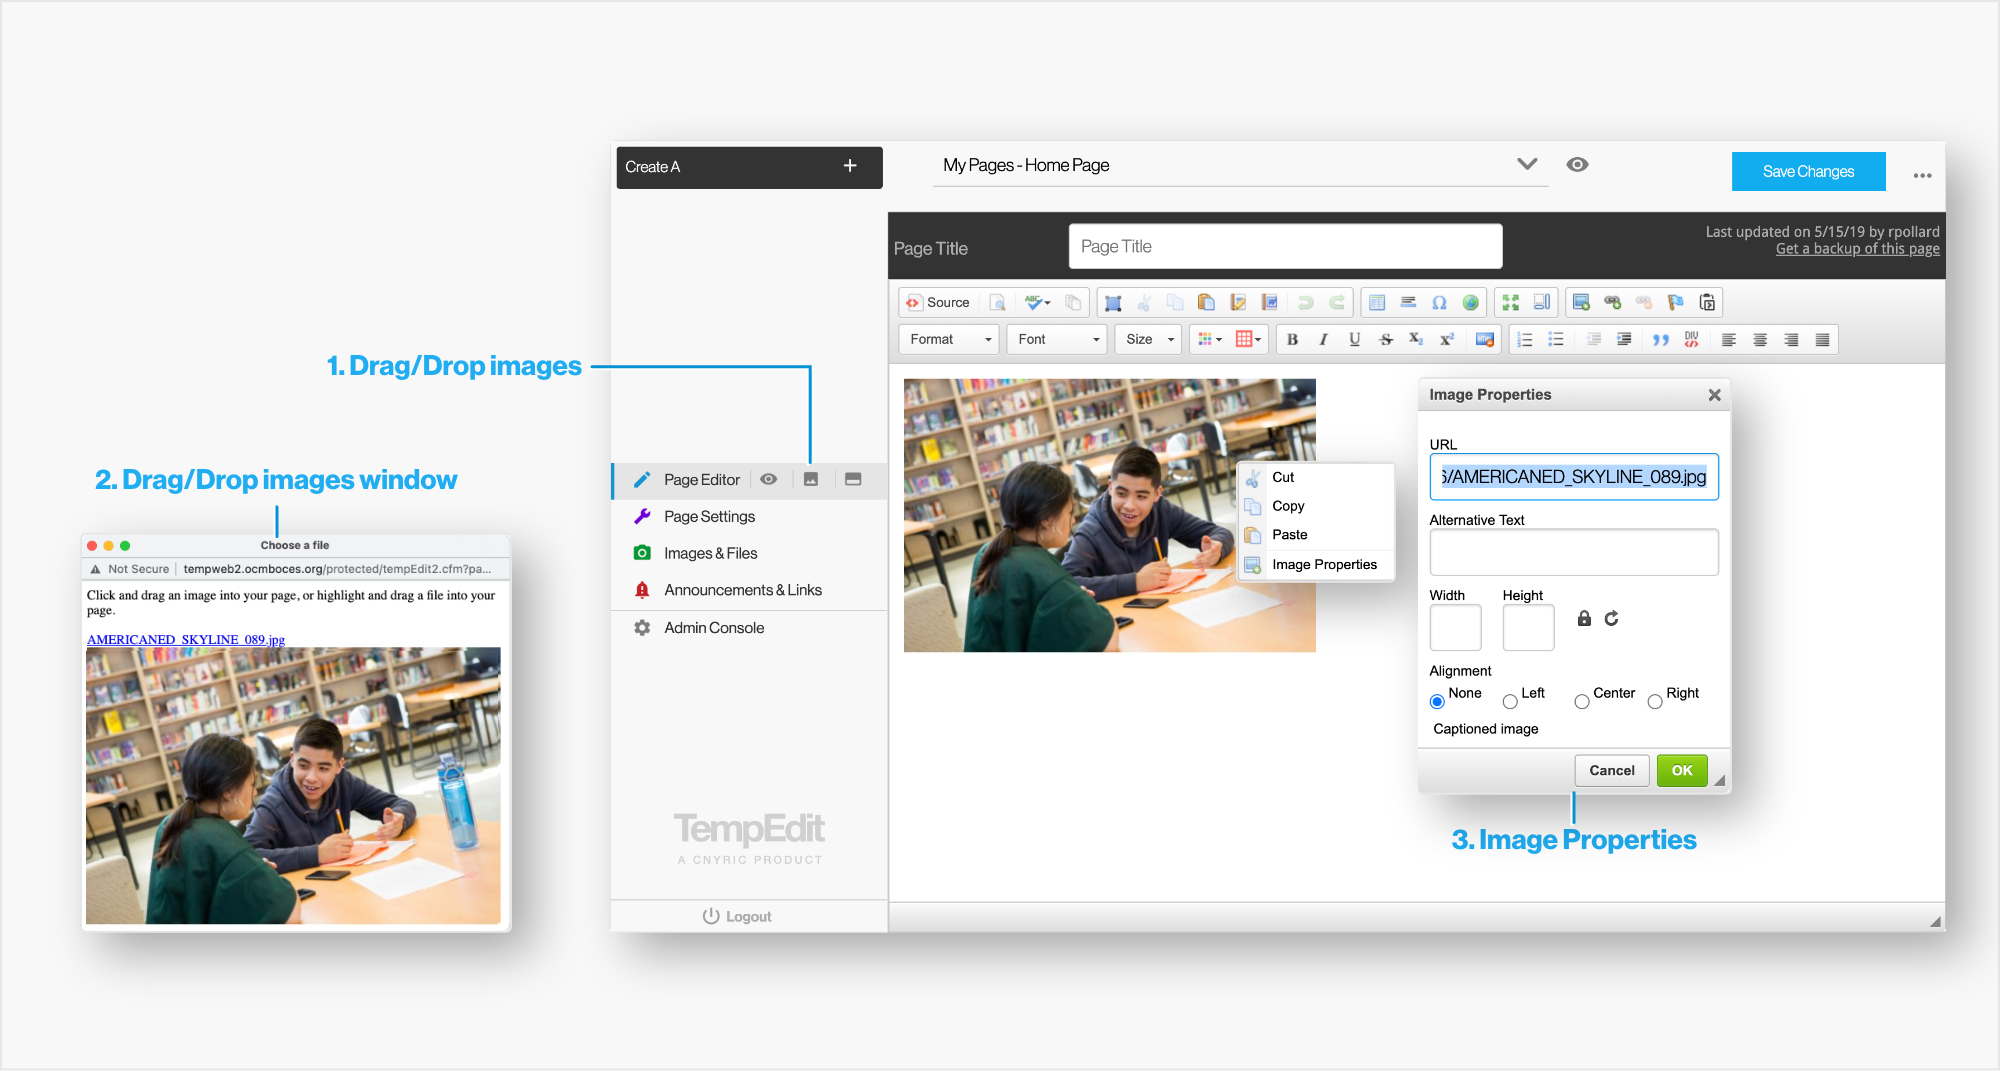
Adding & Styling Images to a page
- The Drag/Drop images button is to the right of the Page Editor title, where you access your uploaded Images & Files.
- By clicking the drag/drop images icon, a popup drag/drop images window will appear. From here uploaded Images can be clicked and dragged on to the Page Body.
- Once an image is in the page body the image properties can be accessed by right clicking on an image and selecting image properties
- Add ALT Text to images for ADA Compliance
- If the photo is too large, set a new pixel width (300-1000 pixels), the heigh will adjust automatically.
- Align the image to your liking
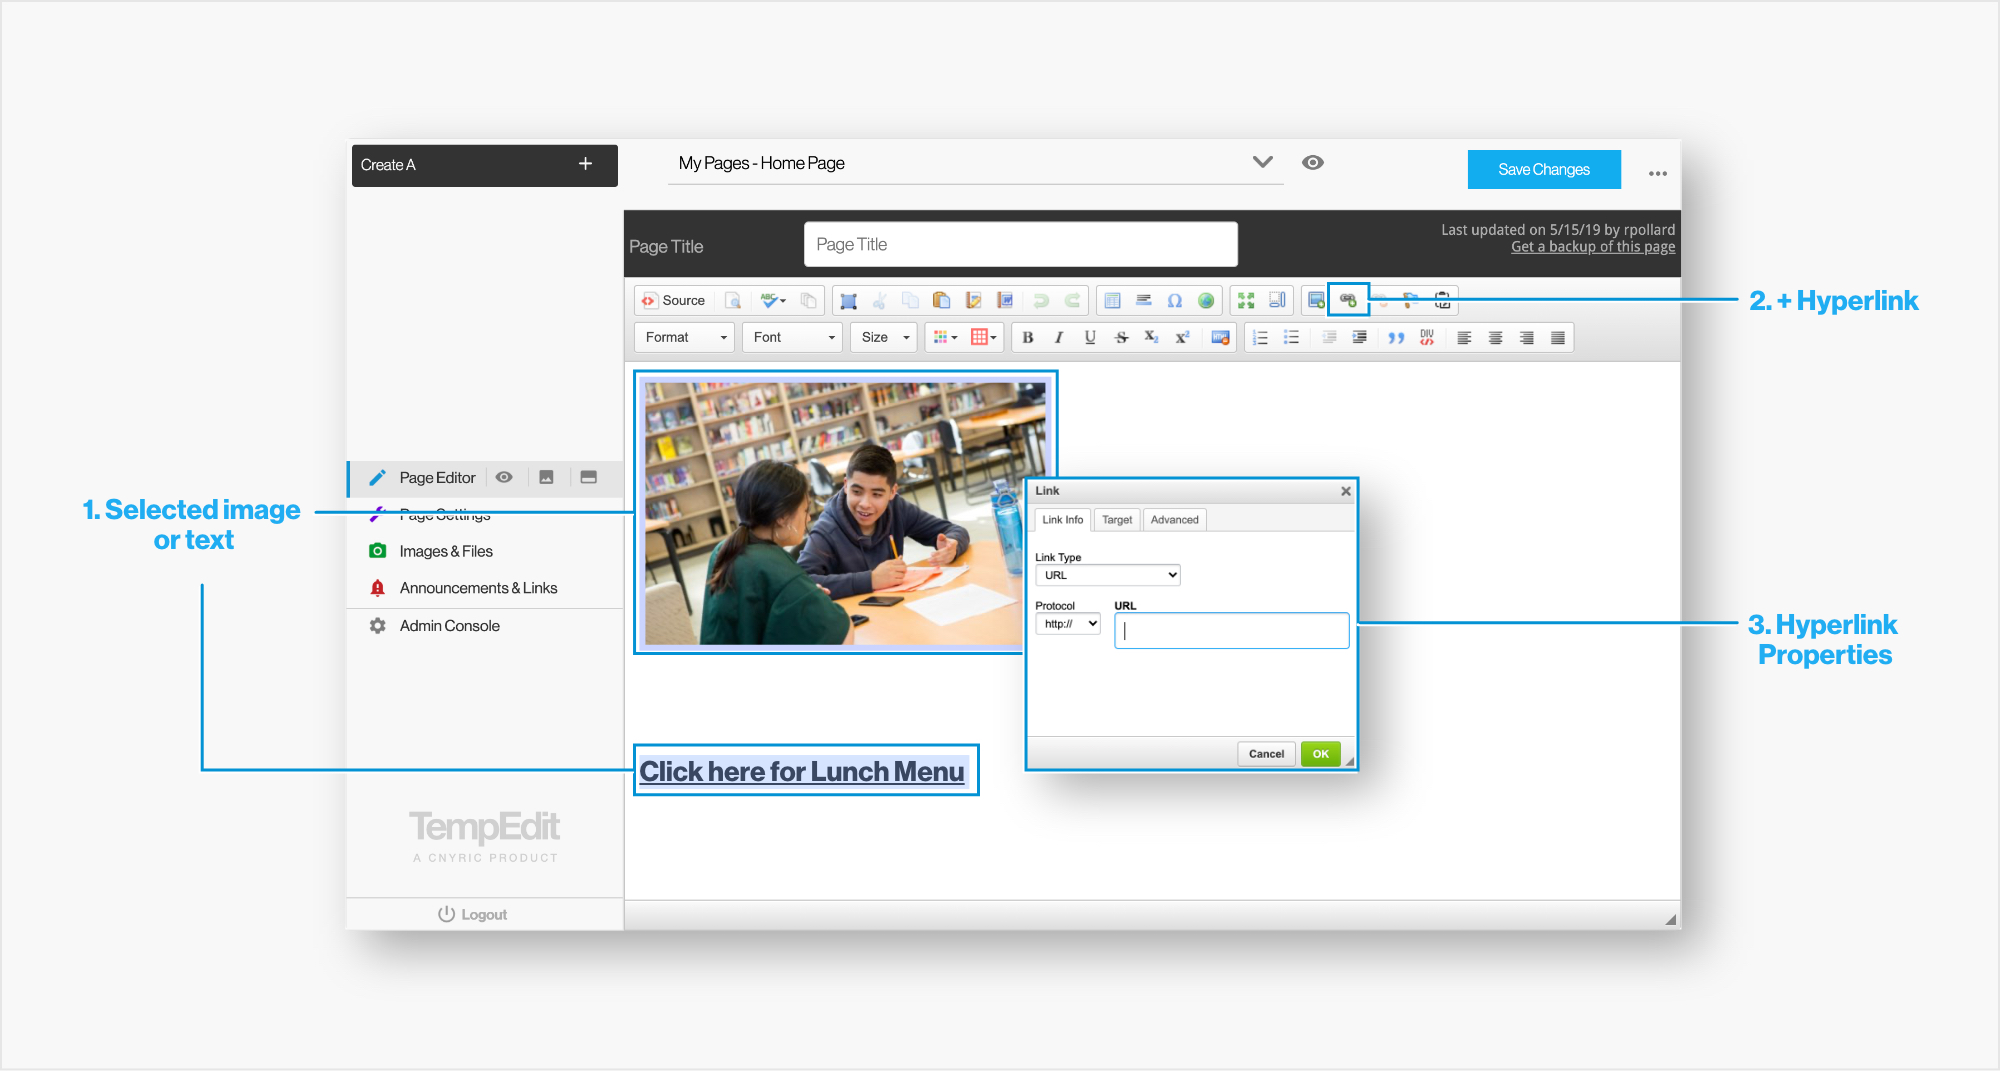
Adding Hyperlinks to Text & Images
- Highlight or select the text or image in the page body that you want to hyperlink.
- Click the + Hyperlink Button,
- Enter the appropriate information (URL, email address) and click ok.
- Save changes and then view the page.
Tip: You can link to any appropriate webpage or document, it does not need to be one that is on your website. You can also link to email addresses.
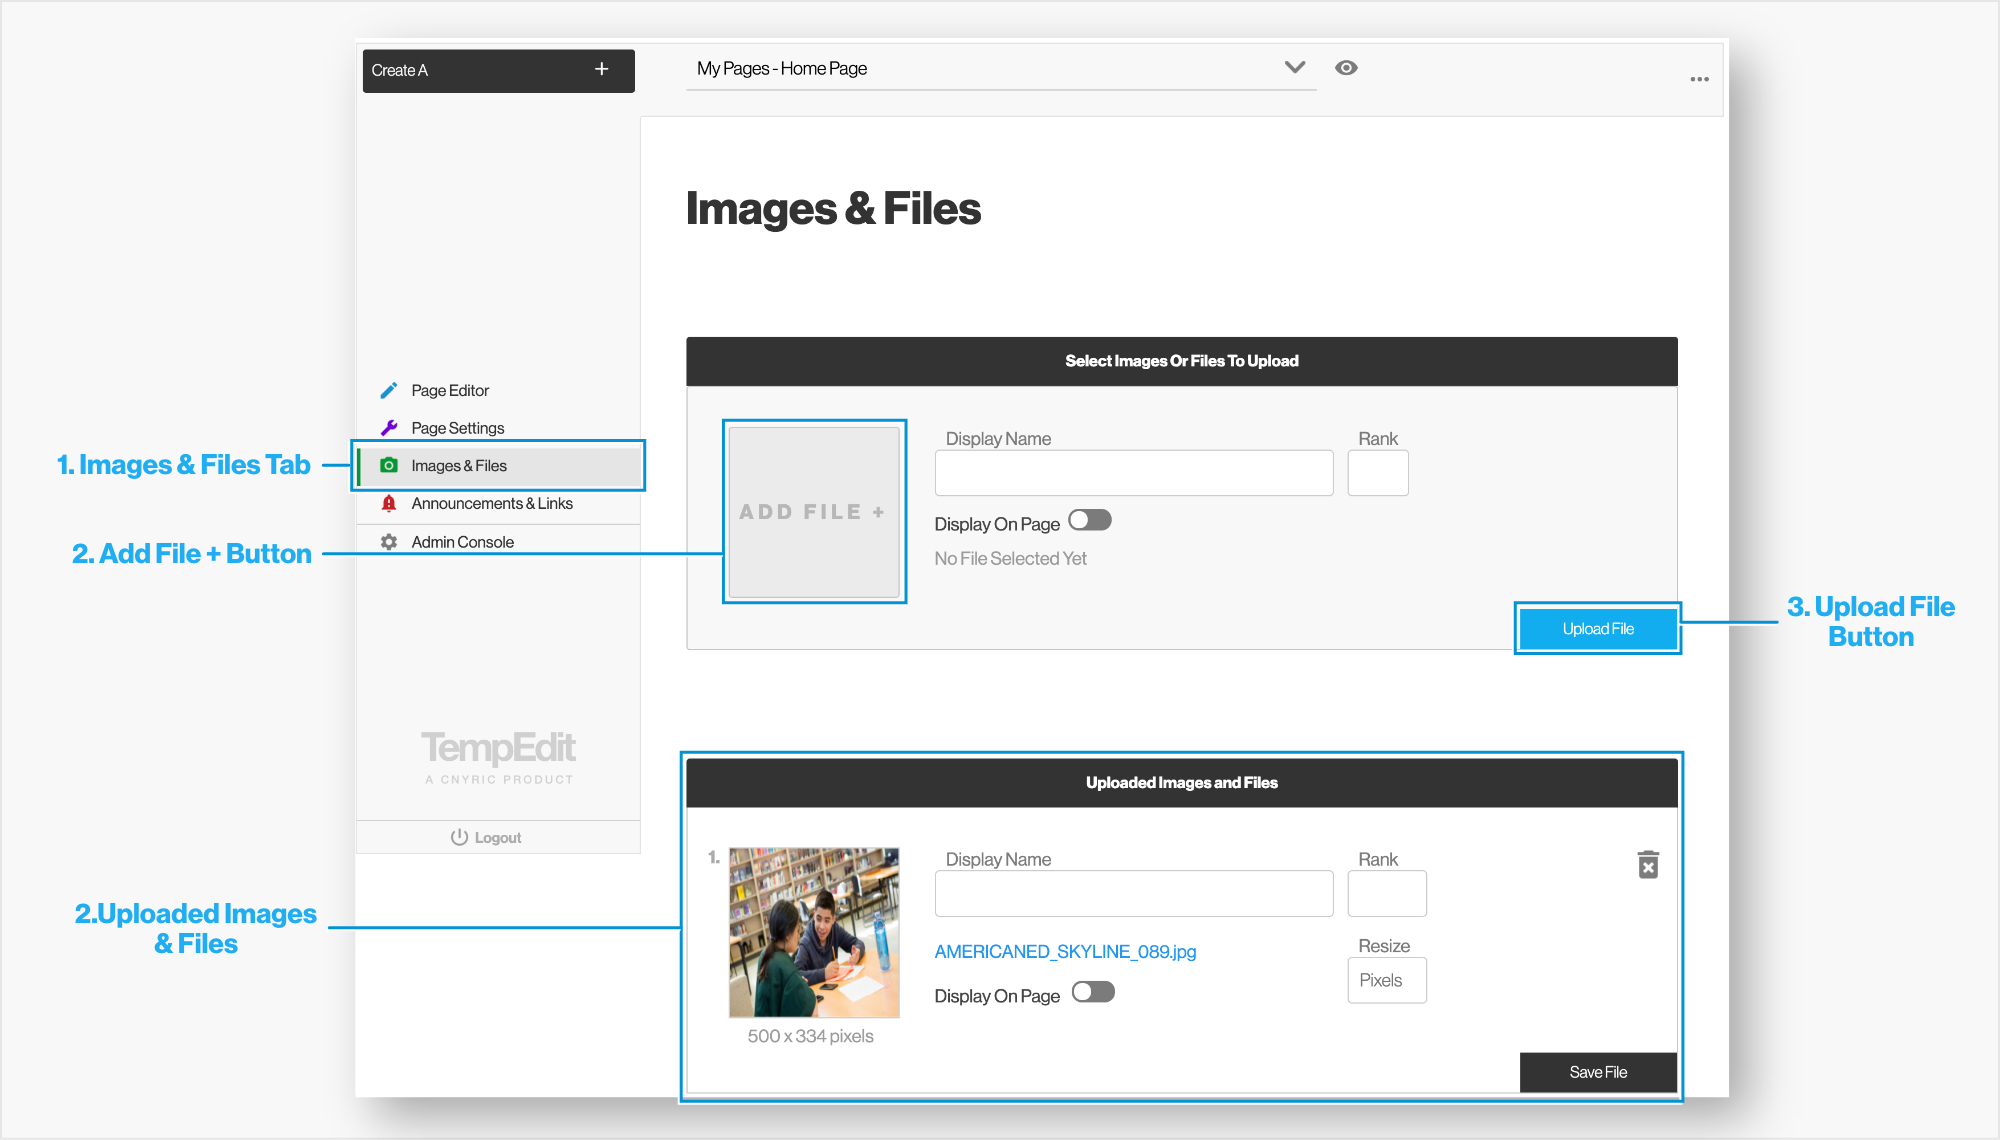
Uploading Images & Files
- To insert images or files into your webpage, you must first upload them. Do this by clicking on the “Images & Files” tab in the tempEdit navigation.
- Choose a file from your explorer/finder window by clicking the Add File + Button.
- Once the desired image or file is selected, upload the file by clicking the upload file button.
- Uploaded Images & FIles appear below under uploaded images & Files.
- You can change the width of the image, give it a display name, rank it and display it on this page.
- b. Displayed Images & FIles via "display on page" appear under the tab system.
Tip: Click on the Page Editor tab, here you can drag/drop your image onto the page.
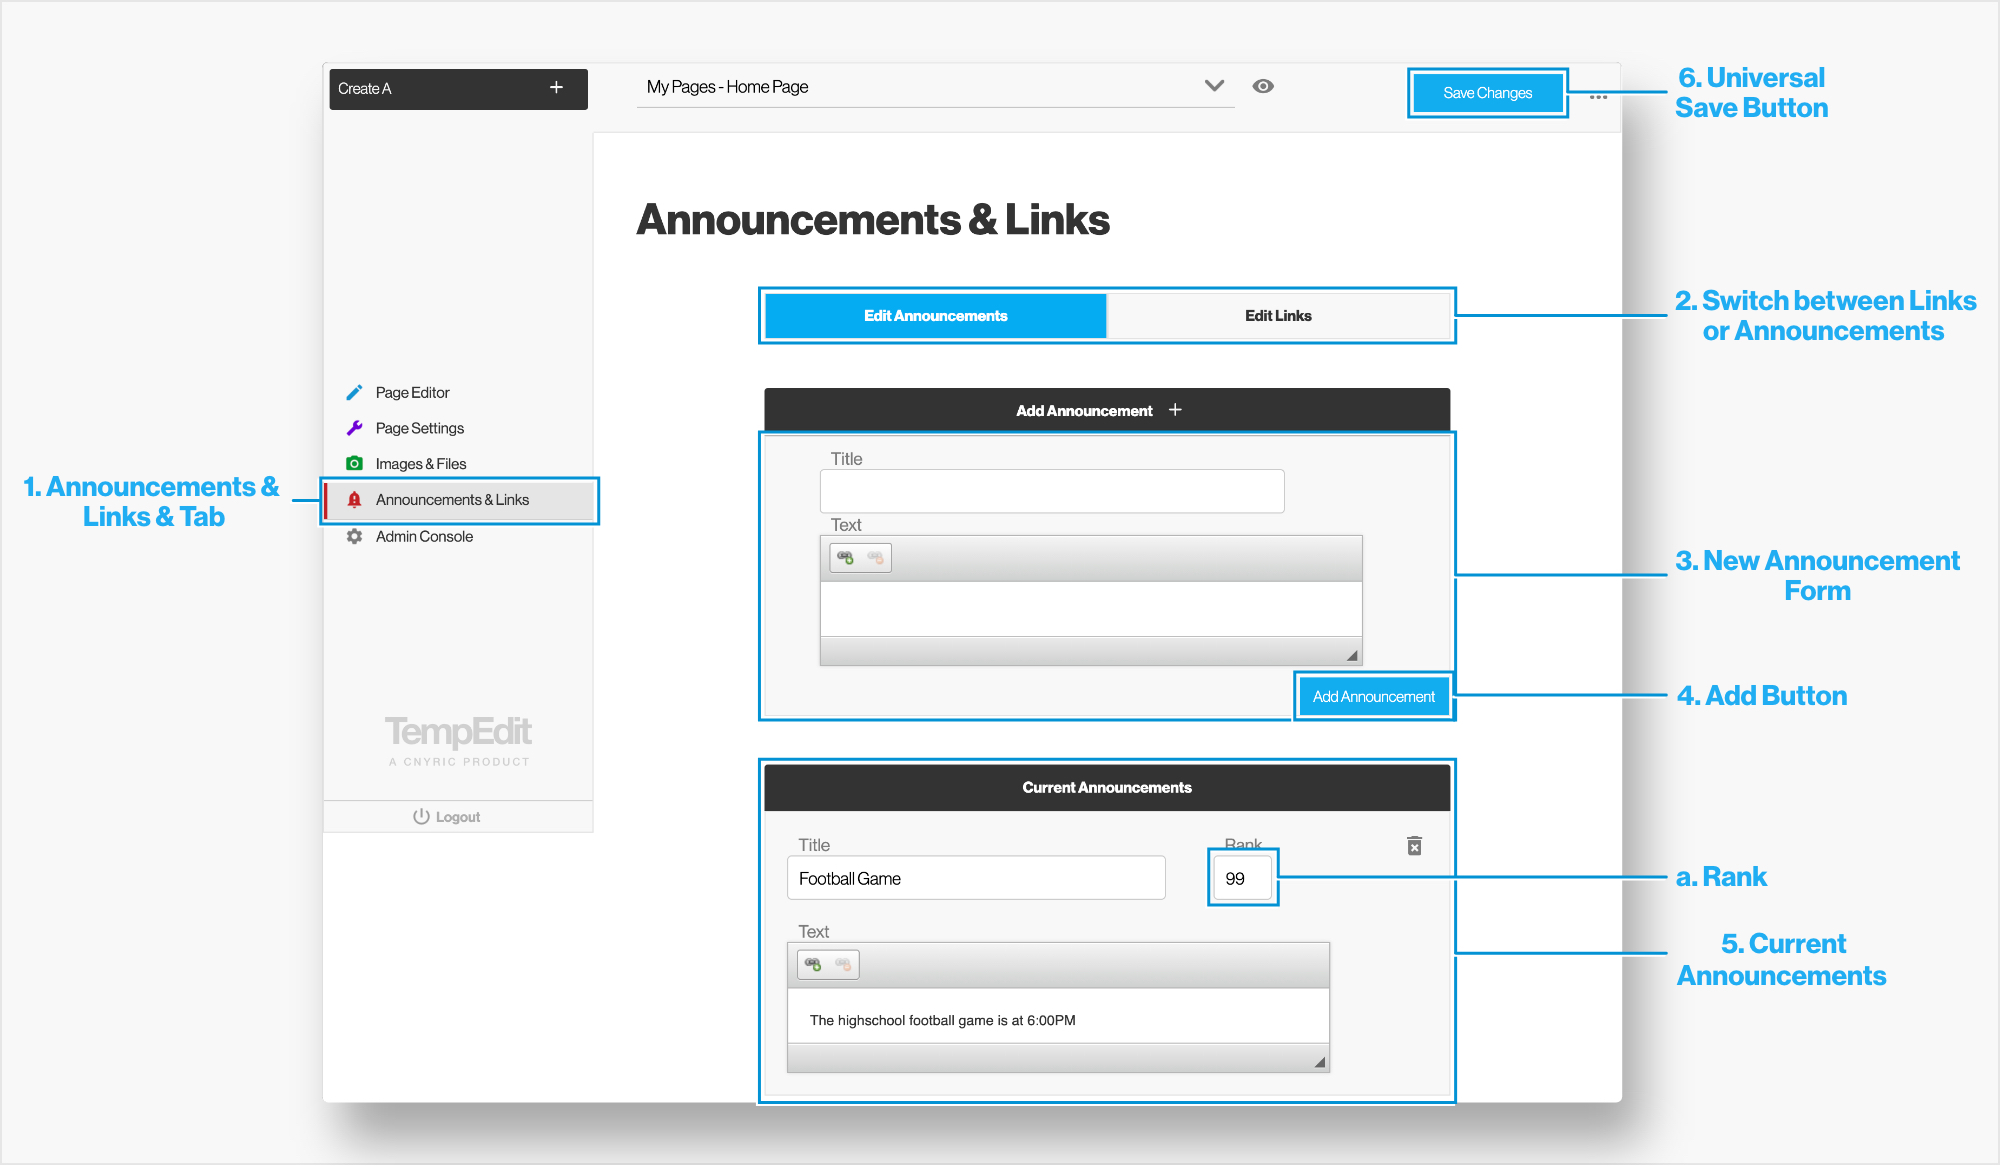
Adding & Managing Links & Announcements
- Links and Announcements are both housed in one area - the Links & Announcements tab. Each page has it's own links and announcments that show up in the tab system.
- To switch between your links or announcements use the bar located at the top.
- To add a link or announcement fill out the form with a title and text for your annoucement.
- Tip: Links can be any appropriate, valid URL
- Press the Add Button located at the bottom of the form
- Your announcement or link will appear down below, under Current Annoucements.
- Announcements or links can be reordered after they've been added with the rank field
- Any changes to current announcements need to be saved with the universal save button.
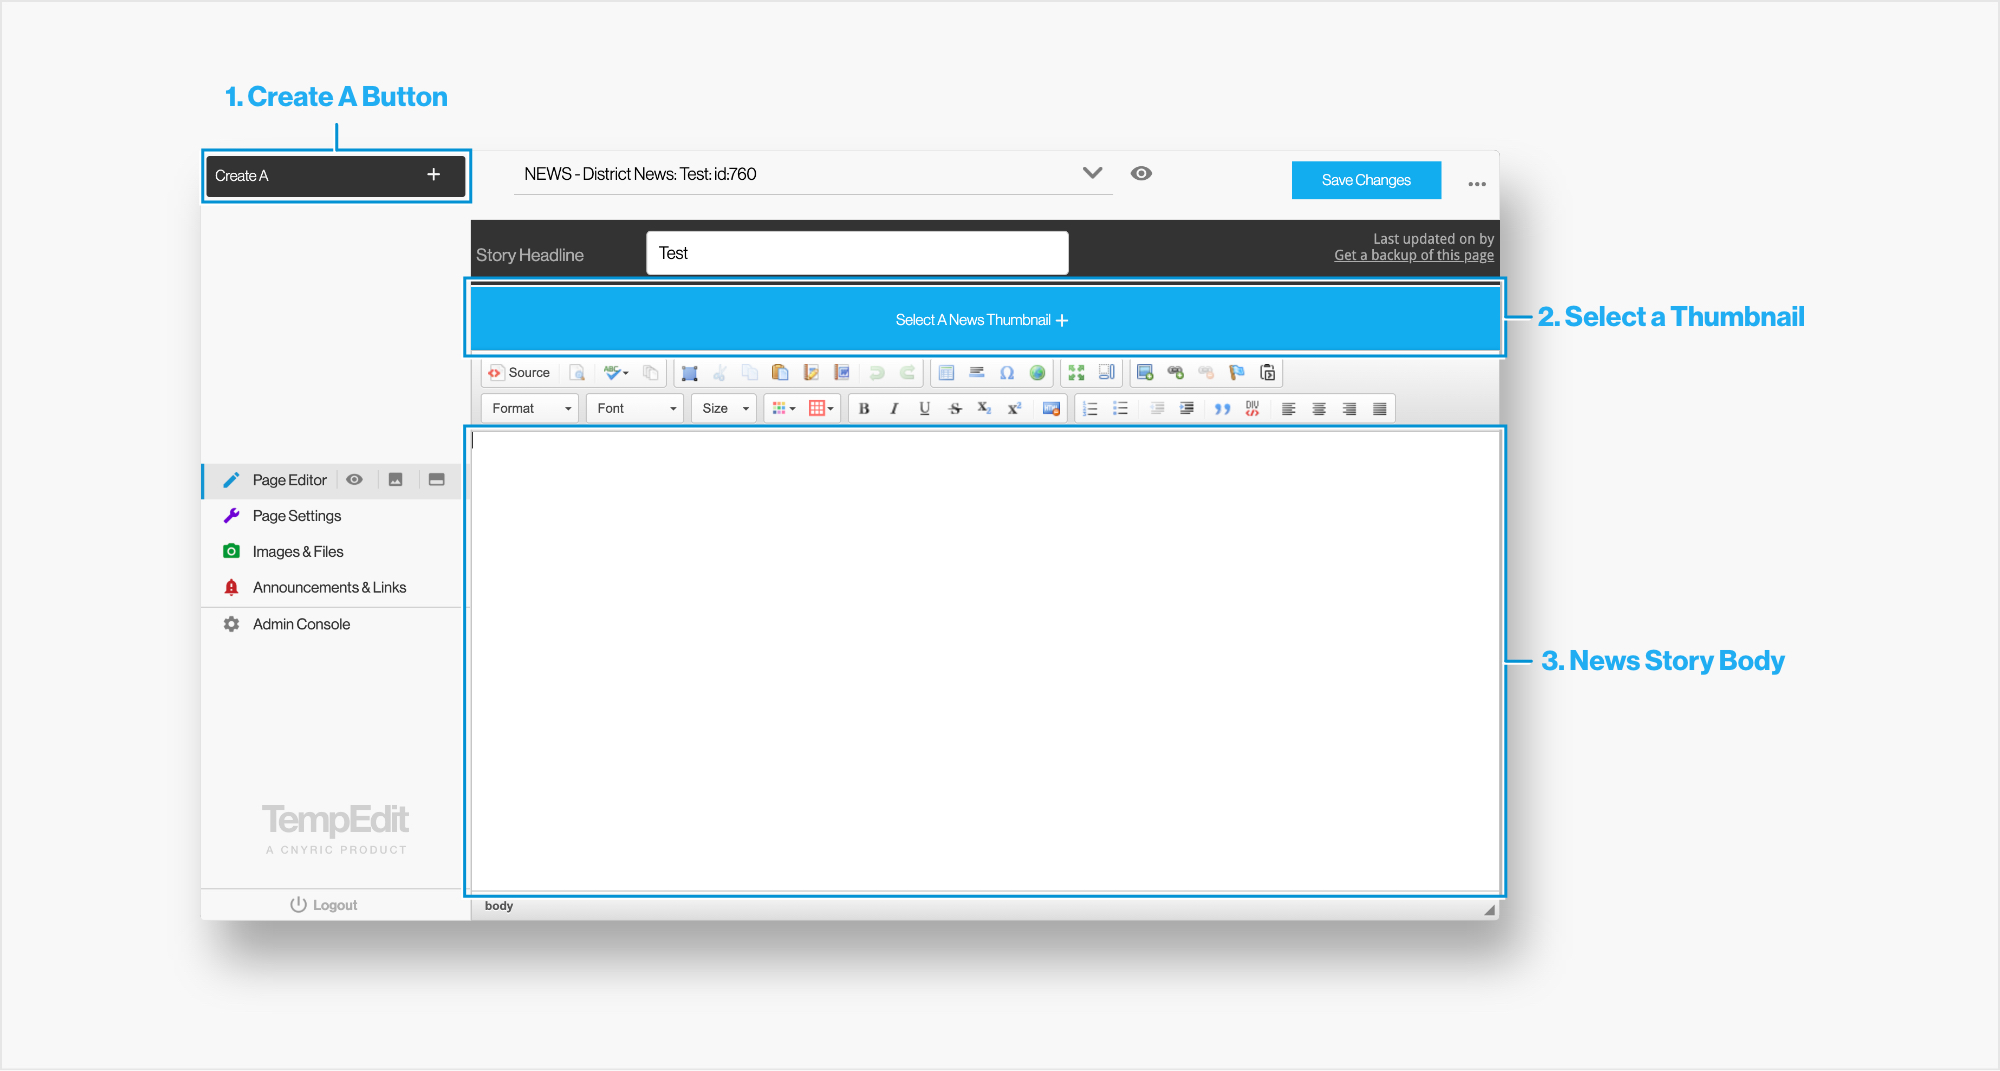
Creating a News Story
- News stories are created via the "Create A" button.
- One of the main differences between a news story and a webpage is the ability to add a clickable thumbnail for the story. To do this click, " Select A News Thumbnail +"
- Here you will see default news thumbnails that you can choose, or you can upload your own custom thumbnail.
- To do this, click "click here to upload a new image", and crop your selected image.
- Tip: If you don't crop your image the thumbnail might appear skewed on the page
- Once a news story is created, images and text can be added in via the page editor the same way you would on a webpage.
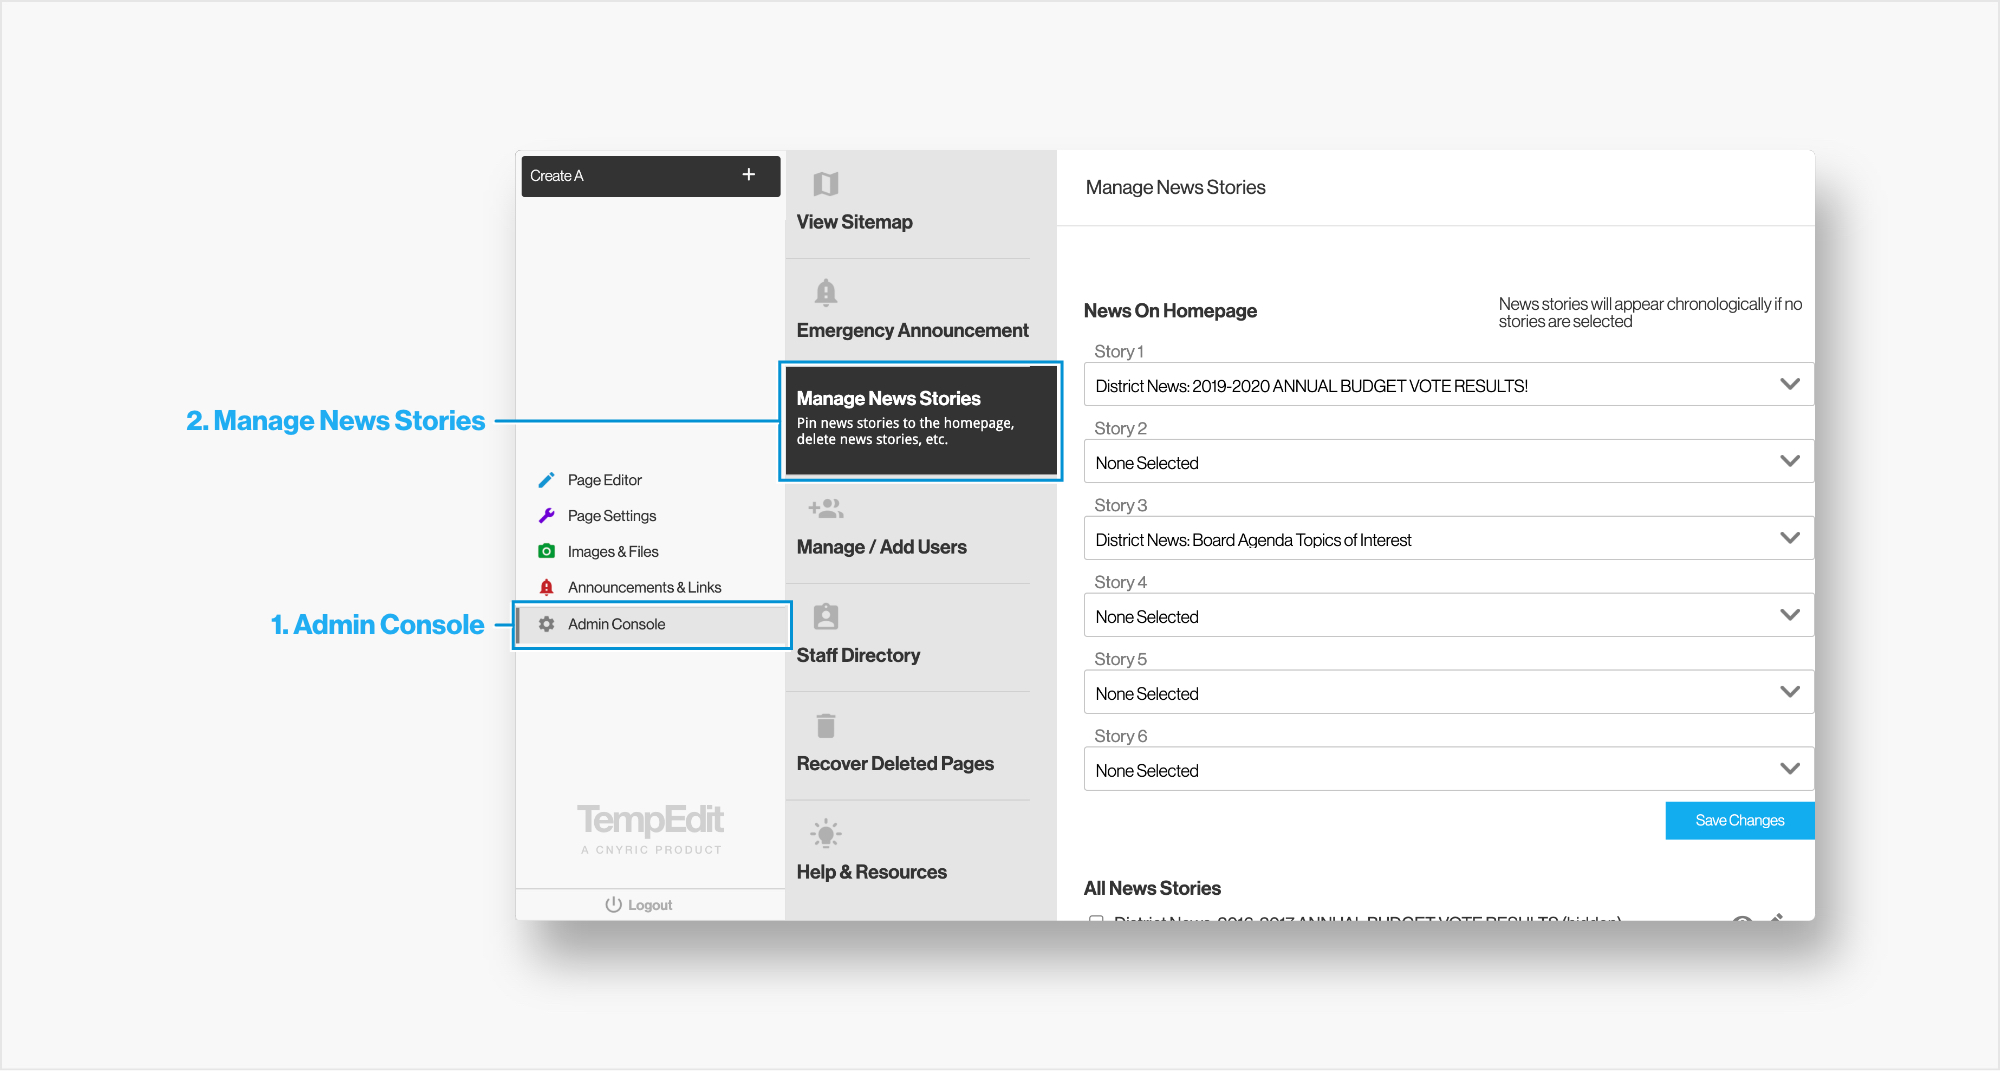
Adding News Stories to Homepage
- By Default, news stories will appear chronologically, from newest to oldest. If you would like you curate news stories on the homepage, navigate to the Admin Console.
- From there a secondary menu will open where you can select "Manage News Stories", here you can select and order the news that will appear on your homepage. Select "none selected" for the news stories to appear chronologically.
- Save your changes!
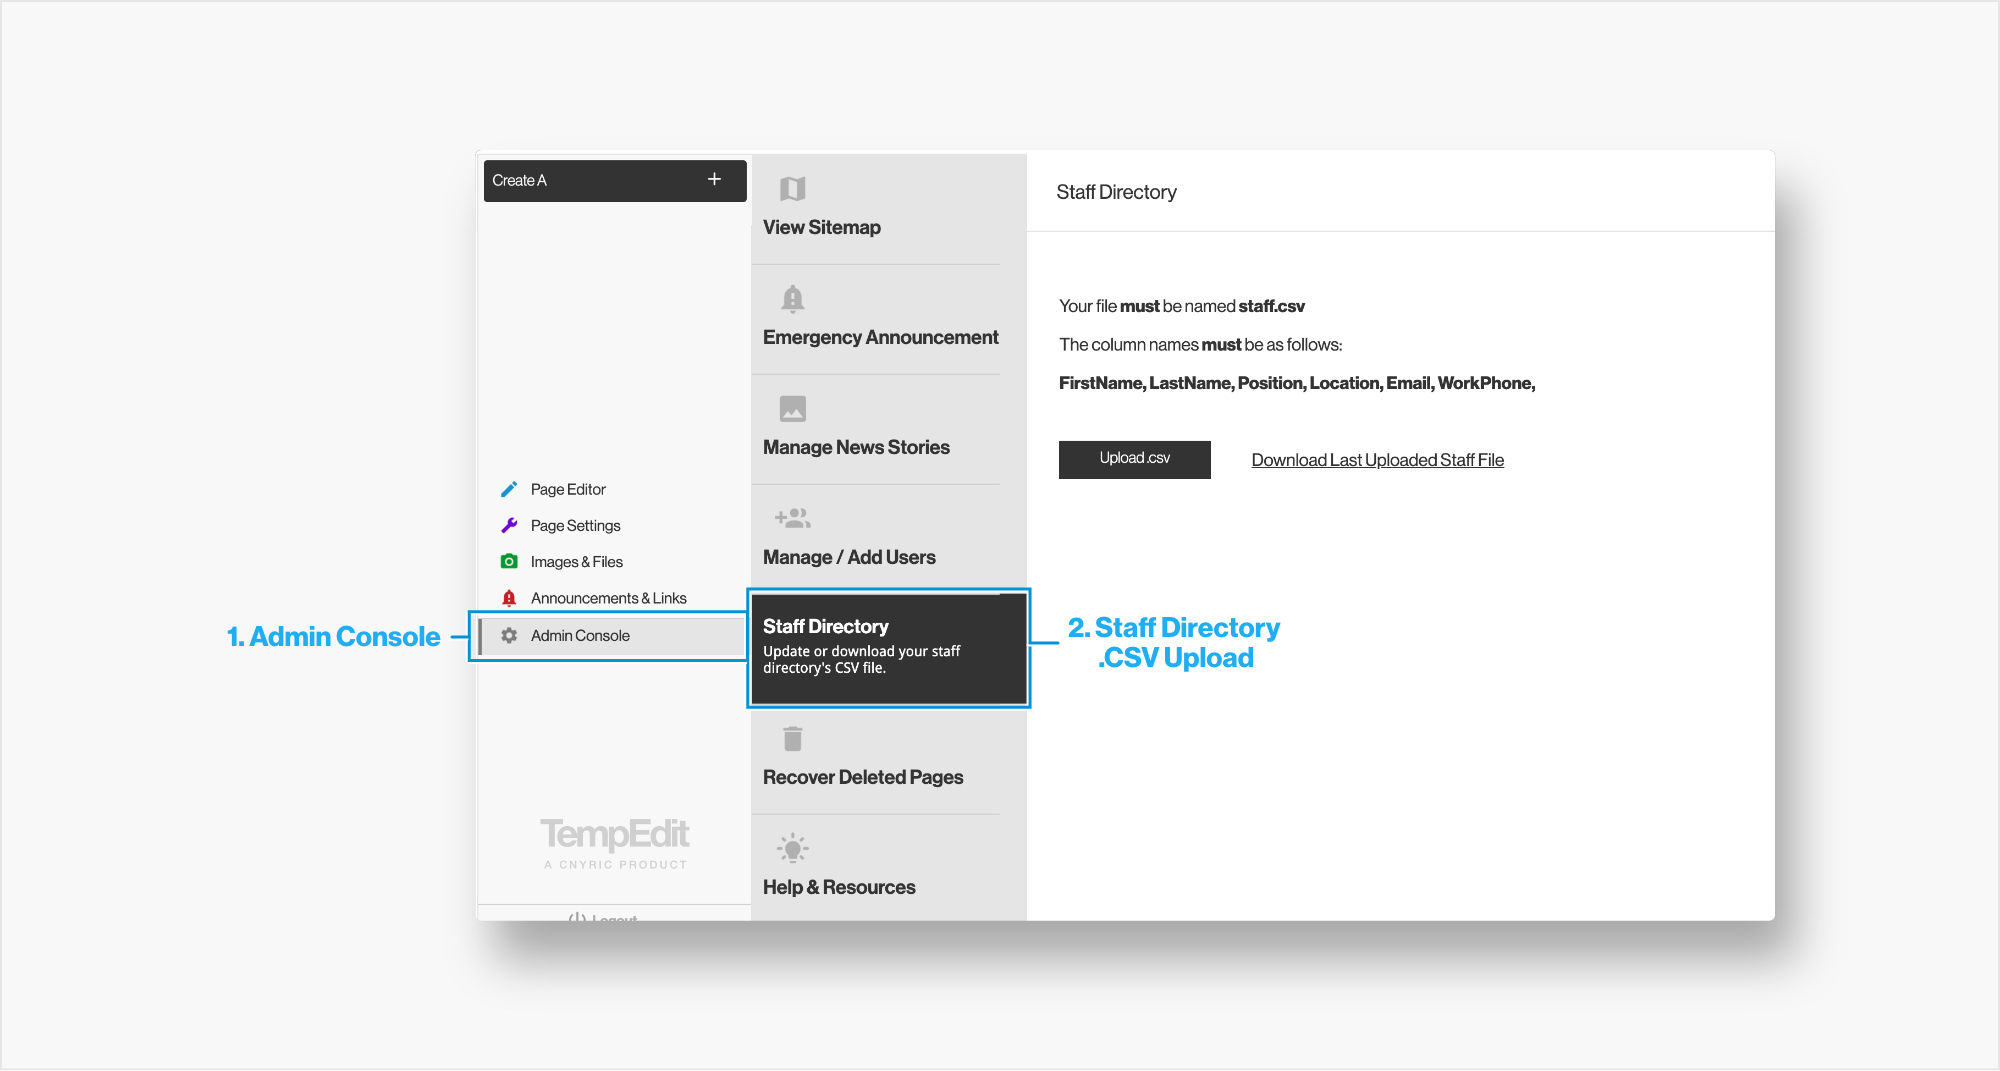
Updating your Staff .CSV
- Updating your staff directory is typically done via a .CSV file. To update the .CSV, navigate to the Admin Console.
- A secondary menu will appear, from there click "Staff Directory".
- Here you can upload your .CSV file. The file name must be "staff.csv". Make sure your column names match what is listed on the page with no addition spaces or extra characters.
Adding an Emergency Announcement to the Homepage
- Emergency announcements can be added to your homepage by navigating to the Admin Console.
- A secondary menu will appear, from there click "Emergency Announcement".
- Anything added to the editor window will display on the homepage below your navigaiton.
- You can also set a date range so this announcement will automatically stop displaying.
Tip: The emergency announcement is typicall used for emergencies such as school closings. Regular daily information should be kept out of this area
Adding and Managing your Users
- Users can be added, edited, or deleted by navigating to the Admin Console.
- A secondary menu will appear, from there click "Manage / Add Users".
- New Users can be added by clicking the "Add A User" button, and filling out the form.
- Changes can be made to users by clicking the pencil icon next to the user's name.
- Acces levels
- Teacher - can access only their own pages
- School Admin - can access district level pages
- Master Admin - can access district level pages and user account information
- Use the checkboxes under "Give user access to" to assign permission to various areas of your website
Tip: Site admins have the ability to log in as any user by clicking a button on the user edit screen
|
|
|